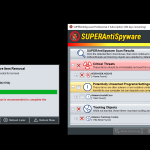
SUPERAntiSpyware Professional X Edition is the paid version of the antispyware tool that we have reviewed. On top of the basic functionalities, the program boasts its 4th generation machine-learning AI, which has a constantly updated database and blocks 1+ billion malicious threats. They claim it is three times stronger than Windows Defender
Apart from that with the Pro X edition, you can enjoy real-time threat blocking, multiple scan options – this means that you can schedule quick, complete, or critical scans, automatic updates, and on top of this fee customer service.
How to Download SUPERAntiSpyware Professional X
You can download the program by clicking the Download button at the end of this review. It is worth knowing that you can start a 14-day trial of X before buying so you can decide whether you want it or not before committing to the purchase.
The Program Review
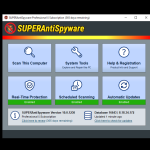
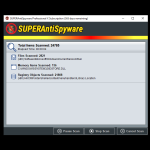
The program interface consists of six rectangular buttons. These are:
- Scan This Computer
- System Tools
- Help & Registration
- Real-Time Protection
- Scheduled Scanning
- And Automatic Updates
There are always two additional links – one to prolong the 365 days long subscription of the full version and another to check manually for new program updates. Let’s discuss all the options. Many of them will be the same in the free and the Pro X version – that can be said about the first three rectangles. The main difference will be in the rectangles 4-6.
Scanning
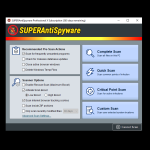
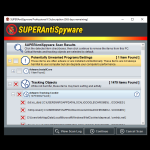
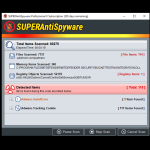
You can choose from a list of so-called Recommended Pre-Scan Actions. The one that is chosen by default is to scan for frequently unwanted programs. Additionally, you can choose to check for malware database updates, close active browser windows, and deleted Windows temporary files.
There are also scanner-related options. You can decide to enable a rescue scan (for maximum boost). It should be used in extreme cases when malware is consuming your PC resources and it makes it difficult if not impossible to scan. This is, however, switched off by default.
The option that is set to on is scan boost activation with the setting to low boost (the other one that can be chosen is high boost). The scanner scans for internet browser cookies, but you can choose to switch this off. Additionally, you can tell it to scan inside of Zip archives or only scan recently modified files (you can determine what you mean by “recently” choosing an appropriate time from a drop-down list.
There are also many other advanced scan options. These include:
- scanning only know files types,
- scanning alternate data streams,
- ignoring files larger than 4 MB,
- ignoring non-executables files,
- ignoring System Restore and Volume info (off by default),
- following shortcut files during the scan,
- and terminating running threats before quarantining (off).
The last three options are:
- Trust/Allowed items
- Excluded Fie locations,
- and Detected Thread Removal.
You can click and modify the list for each of these.
System Tools
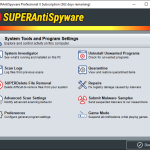
System Tools Section contains 10 subsections.
System Investigator allows you to see what’s running and what is installed on your PC.
Scan Logs contains text-based information on what happened during your previous scans.
SUPERDelete File Removal lets you delete files that are difficult to remove manually. Just add them to the list.
Advanced Scan Settings contains the same settings that we have discussed in the Scan section.
Preferences contain a plethora of settings for the program. Let’s discuss them here:
In the General Configuration section, you can decide whether you run the program in the system tray, whether you want it to autostart on Windows boot and if you want to see the splash loading Windows. It is worth knowing that SuperAntiSpyware is integrated with Windows Explorer, which means that you can right-click any file and scan it or remove it.
All of these options are set to on by default. There is also another that is set to off – disabling anonymous threat reporting. If you don’t want to send such information to SUPERAntiSpyware, you can set it to on.
The program lets you also choose one of the two color schemes – the default one called SAS Default and an attractive High Contrast Black.
Then we have the Start-Up Scanning section. Normally, the program doesn’t scan your system during startups but you can change it to one of the following behaviors on startup to perform:
-
-
- a Critical Point Scan
- a Quick Scan
- a Complete Scan
- a Custom Scan
-
If one of these is chosen you now can decide whether you want to check for updates before the actual scan and whether you want to hide the user interface during this operation.
The next section is E-mail Alerts, which lets you send e-mail notifications to an address of your choice. If you decide on this, you can additionally tell the program what kind of info you want to send. This includes: schedules can logs, clean logs, and schedule system investigator logs.
The last section in the Preferences window gives you the ability to reset all the program’s options to their defaults.
After Preferences, there is a section called Unwanted Programs where you can uninstall stuff that you didn’t know about and that you don’t need.
Then we have Quarantine where items that are potentially malicious are store. You can decide to remove all items or restore them. All of the items on the list will be automatically deleted within 30 days, although you can change this number to your liking as well.
The next section is Registry where you can do repairs fixing registry damage that was caused by malware – of course, if there is anything to fix.
If you have found some potentially malicious software, you can send a sample to Support.com (the makes of the program – this is what Submit Malware Files section is for.
The last System Tools and Program Settings section is Game Mode – you can enable this and the program will make sure that your gaming experience will not be adversely interrupted by the SUPERAntiSpyware activity.
Help & Registration
The third block in the program interface is Help & Registration. Here you register your full version of SUPERAntiSpyware Professional X. You can also deregister the computer you are using it on and transfer the license to another machine. There is a convenient way to contact customer support and the troubleshooting section – choosing the Safe Mode scan and allowing the program through Windows Firewall.
Real-time Protection
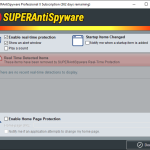
First of all, you can decide whether you want the real-time protection to be running. If this is set to yes, you can choose whether you want to show an alert window or play a sound.
Another option is to set the notification for any startup item additions.
You can also set up so-called home page protection – a smart mechanism that notifies you however programs attempt to change your homepage in your browsers.
Scheduled Scanning
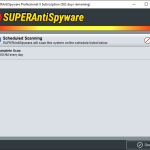
Upon clicking on the Scheduled Scanning box you can notice that there is one Complete Scan scheduled for 2:00 AM every day. By clicking on the red/green circle you can turn the functionality of schedule scans on and off.
You can also remove the scheduled scan on the list or modify its settings. There’s a lot to change here. First of all, you can choose a type of scan. The types include:
- Quick scan,
- Complete scan,
- Custom scan,
- Critical Point scan,
- and System Investigator.
In each of those, you can choose whether you want to show the program window while scanning and whether you would like to check for updates before the scan begins. These two options are set to on by default.
There are also two other options that are off but you can change them to on if you like. These are automatic quarantine and removal of found malware and the automatic reboot for your PC in order for the removal to be completed.
Those two options cannot be set to on when System Investigator is chosen. Instead, you receive these options:
- Use the online whitelist to filter results
- Scan results for threats
- Rebuild cache while scanning system,
- and Highlight changes within the last x days where x can be one of the 12 predefined values between 1 and 365. If this is set to on you can decide whether you want to only show changes in the report.
The second section of the Scheduled Scan Settings is the actual Task Scheduler.
You can choose the precise scan start time and the day(s) and you can also decide whether you want to start the scan immediately when it was missed due to the PC being off. By default, the program will also wake the computer from sleep if the scheduled scan has to be performed but you can change that option to off too.
The last option here is to power down the PC if the scheduled scan is complete – you can choose it to be shutdown, hibernation, or sleep.
Last but not least, you can add as many different scheduled scans to the list as you want.
Automatic Updates
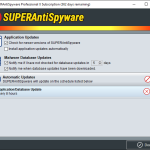
The default option here is to automatically check for a newer version. You can also decide whether you want to install all updates automatically (off by default).
Malware Database Updates section lets you decide how often (if at all) you want to be notified about the situation in which you didn’t check for updates (5 days is the default) and to notify you about the fact that the database updates have been downloaded.
You can also set up automatic updates in pretty much the same way as the scan scheduler described above.
The Bottom Line
If you are looking for a full-fledge antispyware solution then SUPERAntiSpyware Professional X is definitely the way to go.

